How to create a Registration Form in HTML?

Hello Coders, In this blog post you will learn about how to create a Registration Form or Login Form in HTML. Creating a Registration form is very easy in HTML. You just need to know the basics and use of input type & label tag. If you don’t know that then learn about it now. We have explained it in detail about creating form.

Registration Form in HTML

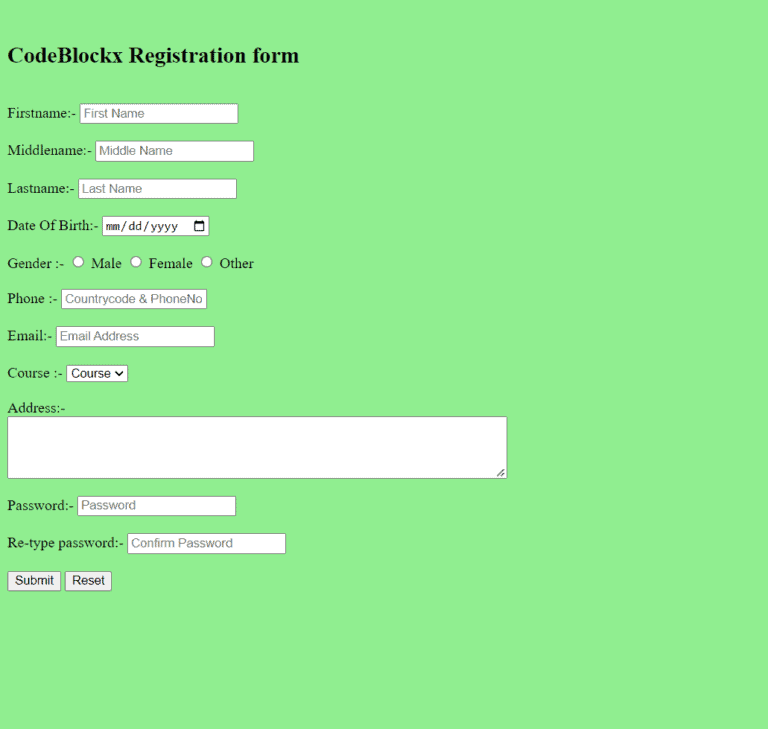
In creating this Registration we have used label, input, type, placeholder, textarea, name, size, password, radio button, checkbox, submit, reset, Date of birth, and many more tags. we have added fields of First Name, Last Name, Middle Name, Date of Birth, Gender, Phone, Address, Email, Course, and Password. You will also be able to know about how to create a date of birth, password, checkbox, radio button, and Textarea with the help of this code.
So here is the code of the form:-

Index.html

<Html>  
    <head>  
        <title>  
             Registration Form  
        </title>  
    </head>  
    <body bgcolor=”Lightgreen”>  
        <br>
        <h2>CodeBlockx Registration form</h2>
        <br>
        <form>  
            <label> Firstname:- </label>        
            <inputtype=”text”name=”firstname”size=”20″placeholder=”First Name”/>
            <br><br>  

            <label> Middlename:- </label>    
            <inputtype=”text”name=”middlename”size=”20″placeholder=”Middle Name”/>
            <br><br>  

            <label> Lastname:- </label>        
            <input type=”text” name=”lastname” size=”20″ placeholder=”Last Name”/>
            <br><br>  
           
            <label> Date Of Birth:- </label>
            <input type=”date” name=”D.O.B”>
            <br><br>

            <label> Gender :- </label>  
            <input type=”radio” name=”male”/> Male  
            <input type=”radio” name=”female”/> Female
            <input type=”radio” name=”other”/> Other  
            <br>  <br>  

            <label>   Phone :-  </label>  
            <inputtype=”text”name=”phone”size=”18″placeholder=”Countrycode & PhoneNo.”/>
            <br> <br>  

            <label>  Email:- </label>  
            <input type=”email” id=”email” name=”email” placeholder=”Email Address”/>  
            <br><br>

            <label>   Course :-  </label>  
            <select>  
                <option value=”Course”>Course</option>  
                <option value=”BCA”>BCA</option>  
                <option value=”BBA”>BBA</option>  
                <option value=”B.Tech”>B.Tech</option>  
                <option value=”M.Tech”>M.Tech</option>
                <option value=”others”>Others</option>  
            </select>  
            <br><br>  

            <label>  Address:-  </label>
            <br>  
            <textarea cols=”70″ rows=”4″ value=”address”>
            </textarea>  
            <br> <br>  

            <label>  Password:- </label>  
            <inputtype=”Password”id=”pass”name=”pass”placeholder=”Password”>
            <br> <br>

            <label>  Re-type password:- </label>  
            <inputtype=”Password”id=”repass”name=”repass”placeholder=”Confirm Password”>
            <br><br>

            <input type=”button” value=”Submit”/>  
            <input type=”reset”>
        </form>  
    </body>  
</html>  

OUTPUT

Registration form in HTML

Hope this blog was helpful to you and you have got the answer to your question. Now you should move ahead and learn about how to create a login page in HTML as we will use most properties of Registration form so it will be now easy for you to understand it.

Thank you for visiting our blog. If you have any other doubts let us know in the comments section, and we will respond to your question as soon as possible.

Leave a Comment

Your email address will not be published. Required fields are marked *